This past Sunday night we decided it was time for a little comfort food to go along with the barbecued chicken the fellas were making. Enter stage right: Macaroni and Cheese (p. 96). This stuff hit the spot...at about 10 o'clock Sunday night...because we're procrastinators, and that's when it got did.
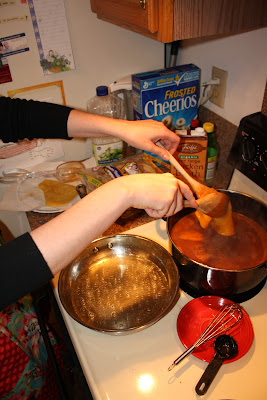
We began by melting a half-stick of butter and adding some flour to create a roux. We cooked this for five minutes. To the side we beat one egg in a bowl.
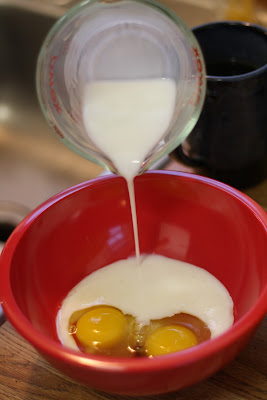
Then we poured in some milk. Dry mustard was added for flavor. This was stirred until it began to thicken (and we grew impatient). Next we tempered the egg by slowly whisking heated milk into the egg. The egg mixture was added to the milk mixture.
Meanwhile, the pasta got to 'a-cookin'.
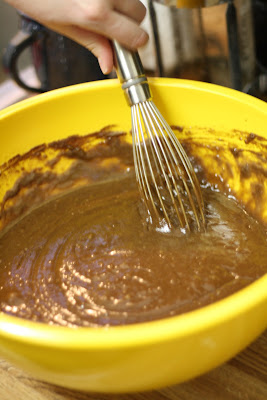
Here comes our favorite part: we added 5-1/2 cups of cheese to our milk mixture. *Sigh* We chose sharp cheddar merely to give it a go. This was whisked together several minutes until the cheese was melted.
We added salt and pepper to taste. Ree recommends several variations to add to the mac-and-cheese, if so desired. We chose to add cayenne pepper. This gave the sauce just the right kick. Hy-ya!
Next we strained our elbow macaroni. We poured the sauce over the macaroni. This was then poured into a 9x13 baking dish. And we almost ate it right there, out of the pan. That's right. We be not ashamed.
We topped this with the remaining half-cup of cheddar cheese (and vowed to get some sun) and baked it for 15 minutes at 350 degrees.
Thankfully, we were able to watch a little "Sherlock Holmes" with the fellas. Otherwise, we would have worn a path in the kitchen floor from pacing back and forth in front of the oven.
The cheesiest result of our baking to date.
We are excited to try this homemade mac-and-cheese with other variations. Send along your suggestions for schnazzied-up comfort food. We'd love to hear what you think!
Happily full,
Thursday, March 17, 2011
Thursday, March 10, 2011
A-lotta Enchiladas
Last Sunday, Lou's brother, Matthew, was in town. We had a dinner party in his honor and invited several friends over for the evening. We wanted to prepare something that was quick and easy, but would feed 9 or 10 people. Oh, yeah. And The Bean. This kid's appetite is huge these days. Grow, baby, grow.
The entree of the evening was Ree's Simple, Perfect Enchiladas (p. 176). We had made her Sour Cream Enchiladas before and thought this cookbook variation would be a good option. Plus, we were already pros at making Ree's delicious version of enchiladas. Alas, we were humbled. Quickly. Just because you've been successful in preparing the same recipe, or a similar one, does not mean you'll be successful every single time. Huh. Profound.
To accommodate our crowd, we doubled Ree's recipe. We started the sauce with a little canola oil and flour to create a roux.
Next we added five small cans of red enchilada sauce. Chicken broth, salt and pepper were added and brought to a boil.
We left this to simmer. Next we chopped an onion. Part way through the knife chopping, Lou decided her handy-dandy rockin'-awesome Pampered Chef food chopper was necessary.
Jo browned two pounds of beef and added the chopped onion and green chiles.
We allowed this to fully cook. Meanwhile, Lou chopped green onions and cilantro. Ah, the freshness of cilantro. Divine.
Next we heated some vegetable oil in a shallow pan. Yes, we really, really heated the oil. A touch too hot, as we later discovered. Corn tortillas are less pliable than flour tortillas. The purpose of the oil was to soften the tortillas before dipping them into the sauce and also allows for easier folding.
The other problem we experienced was Lou's lack of a good pair of tongs. She had big, plastic salad tongs, but not good corn tortilla tongs. A momentary crisis ensued as one tortilla after another ripped as Lou tried to move them from the oil to the sauce. Ah...ingenuity. Wooden spoons to the rescue. They sufficed quite nicely, actually.
After Lou dipped the tortillas in the sauce, Jo began to fill them with the meat mixture. However, the tortillas were so hot from our hotter-than-Hades-hot oil that Jo burned her fingers trying to roll them. We quickly figured out this was a job for more than just two people. Enter Al. She saved the day - and saved Lou and Jo from going into an existential funk. Fortunately none of the guys in the other room knew their supper was almost lost.
Al quickly assumed the role of sauce and filling liaison. Bless Al. She's wonderful. With her help, we finished dipping, filling and rolling the enchiladas. We did one pan with black olives and one for the olive-averse.
Lou added the chopped cilantro to the remaining sauce. Both pans were happily topped with the sauce and generous amounts of grated sharp cheddar cheese.
The enchiladas had a hot party in the oven for 20 minutes at 350 degrees.
The results were a success, despite the foibles of the process.
Alongside our enchiladas, Lou whipped up Jo's quick recipe for guacamole.
Jo's Quickly-Gone Guac
6 medium avacadoes
1 can Mexican-style RoTel, drained
salt, to taste
Tabasco Green Pepper Sauce, to taste
lime juice, to taste
Peel each avacado, trashing the pit and removing the flesh into a medium bowl. Use a potato masher to smash the avacadoes to desired texture. Stir in the RoTel. Add several generous pinches of salt and combine. Give the guacamole a good dousing of the Tabasco, shaking it evenly over the top of the mixture. Then add a couple of good splashes of lime juice. Stir to combine. Taste the guacamole with a tortilla chip. Add salt, Tabasco or lime juice to your liking. Enjoy!
Happily full,
Monday, March 7, 2011
Rollin' in the Dough
We wish...
Last Monday Mr. Fabuful wanted to take some breakfast treats to work, and Lou needed something to take as snacks to her Bible study. The solution: Cinnamon Rolls (p. 36).
Now, once upon a time (only a month ago), Jo tried her hand at making these herself. With, let's say, some interesting results. She killed the yeast. The cinnamon rolls quickly became cinnamon biscuits. Our little band of Pioneer Woman foodies loved them anyway. Yeast killer that she was (or is), this time Jo allowed the yeast to live. Just you watch it, yeast.
We started out with heating the milk, vegetable oil and sugar in a saucepan over medium heat.
From Jo's yeast-killing experience, we learned yeast is activated between 120-130 degrees Fahrenheit. Thus, we used a thermometer, bringing yeast-thriving success.
After the yeast was activated, we stirred in our flour. Jo and Lou were pleased. The dough was sticky and doughy - unlike Jo's cinnamon biscuits. An impromptu dance party was held in the kitchen to celebrate the not-dead-dough.
We covered the dough and let it rise about an hour. Here's our cute, little trick-or-treater. He's a ghost, can ya tell?
We floured the counter top and rolled out the dough. And ate little pieces of it. Yum in the tum.
Then we poured melted butter on the dough and spread it around. We really should get our cholesterol checked.
We decided to combine the sugar and cinnamon in a bowl. This was sprinkled liberally over the dough.
Next we rolled in the dough. Literally and not literally. Oh, the English language.
Anyhoo...we both learned a special trick for cutting the rolls from the dough log. But, first it was time for Jo to floss.
Actually, our nifty trick for cutting the dough is using floss.
Floss helps to cut perfect rolls. Jo learned this from her grandmother, and Lou learned from her father who had taken a baking class. Works like a charm. This keeps the log shape of the dough instead of smashing it down with a cutting knife.
Each pan was buttered, and the cinnamon rolls rejoiced as they were joined together in the bonds of holy bakery. We need more sleep. We followed Ree's tip of not crowding the rolls in the pans to allow for additional rising. Good idea, Ree.
Into the oven they went for 15 minutes at 375 degrees.
Time for the frosting. We poured a whole happy bag of powdered sugar into a bowl and melted a goodly amount of butter. Shocker. This was combined with milk and salt.
Next we added the maple flavoring and a splash more milk. Ree's recipe calls for a touch of strongly brewed coffee. We decided to forgo the coffee this time.
Once the rolls were done, we took them out and sniffed them for 17 minutes, per our own instructions.
Next Lou ladled the frosting over the hot rolls as Jo drooled onto her camera as she clicked away.
The cinnamon rolls were a wonderful breakfast food enjoyed late that night, early the next day at Mr. Fabuful's workplace and early the next evening at Lou's Bible study.
And the yeast rejoiced. Amen.
Happily full,
Tuesday, March 1, 2011
There are no good puns involving the word 'Sheet'
Please forgive our title. We cannot think of something appropriate this evening for the life of us. Oh dear.
OK. Now for the real stuff.
On the night we had friends over and ate the Onion Strings (see our post here) and barbecue, we also made Ree's Chocolate Sheet Cake (p. 218). Di-vine. The texture was a perfect balance between brownie-land and cake-land. Lou and Jo remember having this kind of sheet cake during wheat harvest when everyone got together to eat. Jo and her siblings would travel from the big city to visit Lou and her siblings for harvest. Good memories.
And. We're back.
In another bowl, we combined eggs, vanilla, baking soda and buttermilk. These were whisked together.
In a small saucepan, we shamelessly melted two sticks of butter and multiple tablespoons of cocoa powder. To this a boiling cup of water was added. We let it boil for just a bit, then removed it from the heat.
Then comes our favorite part. We combined the chocolate-butter mixture (sin sauce) with the dry ingredients and whisked them together. There is no better smell in the universe than in this step.
This was put to bake in the oven for 20 minutes.
For the icing, we melted one-and-three-quarters sticks of butter. Cocoa powder was again added. Next came several splashes of milk and vanilla, followed by the powdered sugar to create the desired consistency.
Then we said, "Forget the cake!" and we ate the frosting alone. Because we're adults, and we can. Psych. We didn't, but it was tempting.
Once the cake was done, Lou immediately poured the frosting over the cake top and began spreading the frosting. Be mindful to spread the frosting quickly after it's poured as it'll set within seconds.
Because this cake is so rich, it is best served with a couple scoops of vanilla ice cream. To, you know, lighten it up. Oh, the sacrifices we make.
Hope you enjoy this wonderful, memory-making, homemade sheet cake.
Happily full,
Subscribe to:
Posts (Atom)